
Introducing VerticalResponse Pop Ups
Building your email list just became a whole lot easier. We’re excited to introduce VerticalResponse Pop Ups. Now you can enhance your website or landing pages with customized pop-up forms that capture email sign-ups and sync seamlessly with your VerticalResponse contact lists — so you can quickly follow up with new subscribers.
What are VerticalResponse Pop Ups?
Everyone has some experience with pop-ups — the smaller windows that appear while you’re browsing a website. As a business owner who needs to grab readers’ attention, you can count on Pop Ups to put your message front and center and help you achieve your marketing goals. In addition to delivering timely information to website visitors, Pop Ups are a powerful list-building tool. Having a fresh, robust email contact list helps you reach prospective customers. While there are so many ways you can go about list-building, adding a Pop Up to your website is one of the quickest and easiest options.
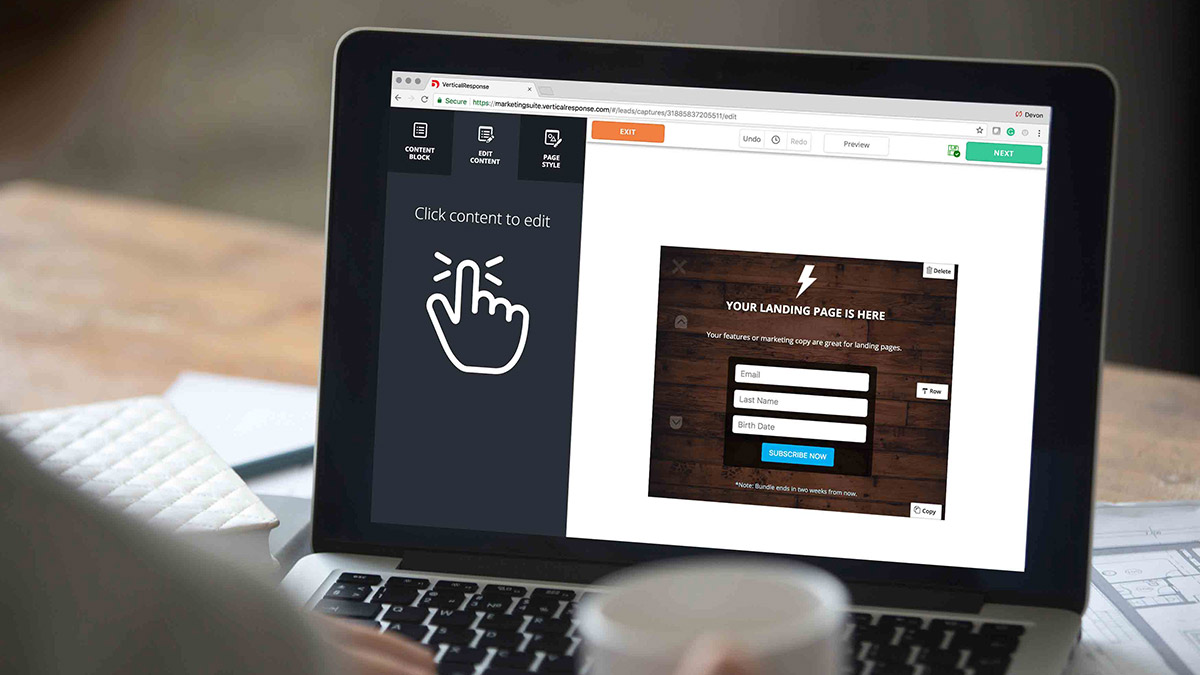
Creating a custom Pop Up in VerticalResponse is simple. Using the same editor you use to create emails in VerticalResponse, you can customize forms that not only collect visitors’ email addresses but also gather other data about your audience, such as phone numbers, geographic locations and birthdates. Embedding the form on your website is easy and doesn’t require any technical or coding experience.
Why use Pop Ups?
Grow email lists and customer intelligence. Use pop-up forms to gather data on prospects or customers such as name, email, birthday, phone number and location. Use that data to get a better picture of who your audience is, so you can provide them with the most relevant marketing content possible.
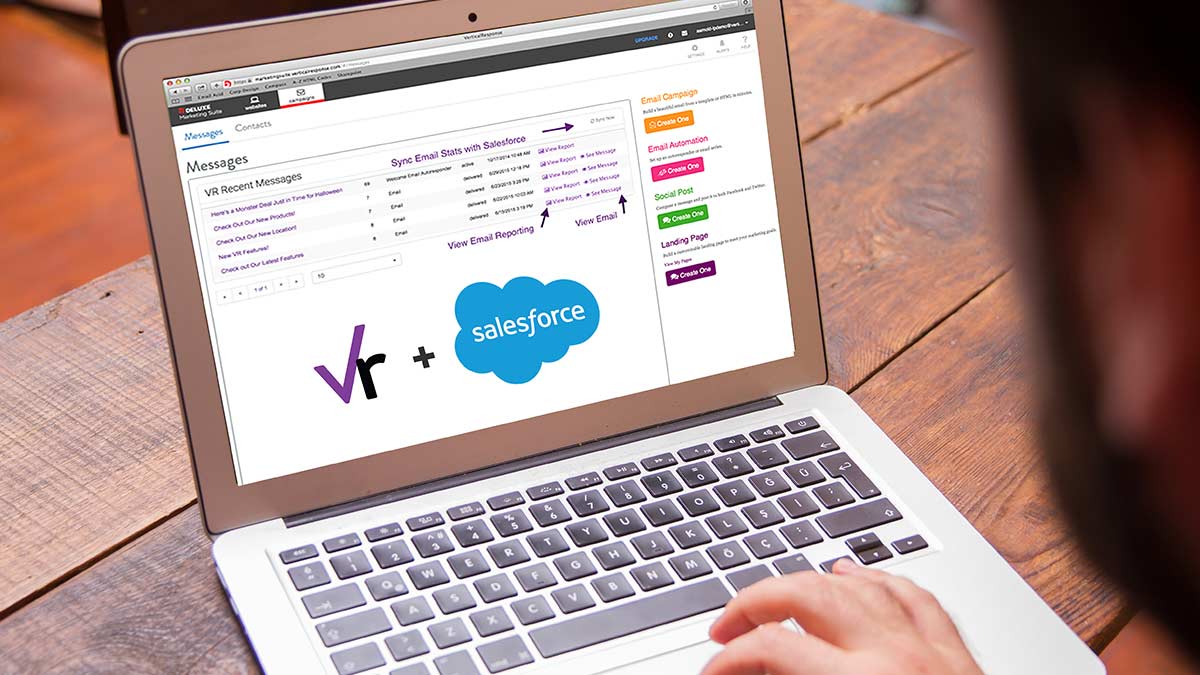
Generate leads and sales. After collecting email addresses through the Pop Up’s sign-up field, leverage the Welcome Series feature in VerticalResponse to create a lead nurture campaign and immediately engage new subscribers.
Save time. Build and customize your opt-in form in minutes. Once you’ve added the Pop Up to your website, all the data gathered is automatically added to your specified email contact list, so you can start nurturing those new leads right away.
Match your brand. Customize the Pop Up with fonts, colors and styles that match your existing website design. For further personalization, upload your own background image. When you’re happy with your design, preview the form right inside the Pop Ups editor.
Flexible placement. You decide where on your website or landing page the Pop Up will look best. Placement options include centered, left sidebar or bottom banner.
Track Pop Up performance. Know how your Pop Up performs with reports that show how many visitors viewed it and how many signed up for your list.
Here’s how to create Pop Ups for your website or VerticalResponse Landing Page:
Creating a new Pop Up can be done in four simple steps.
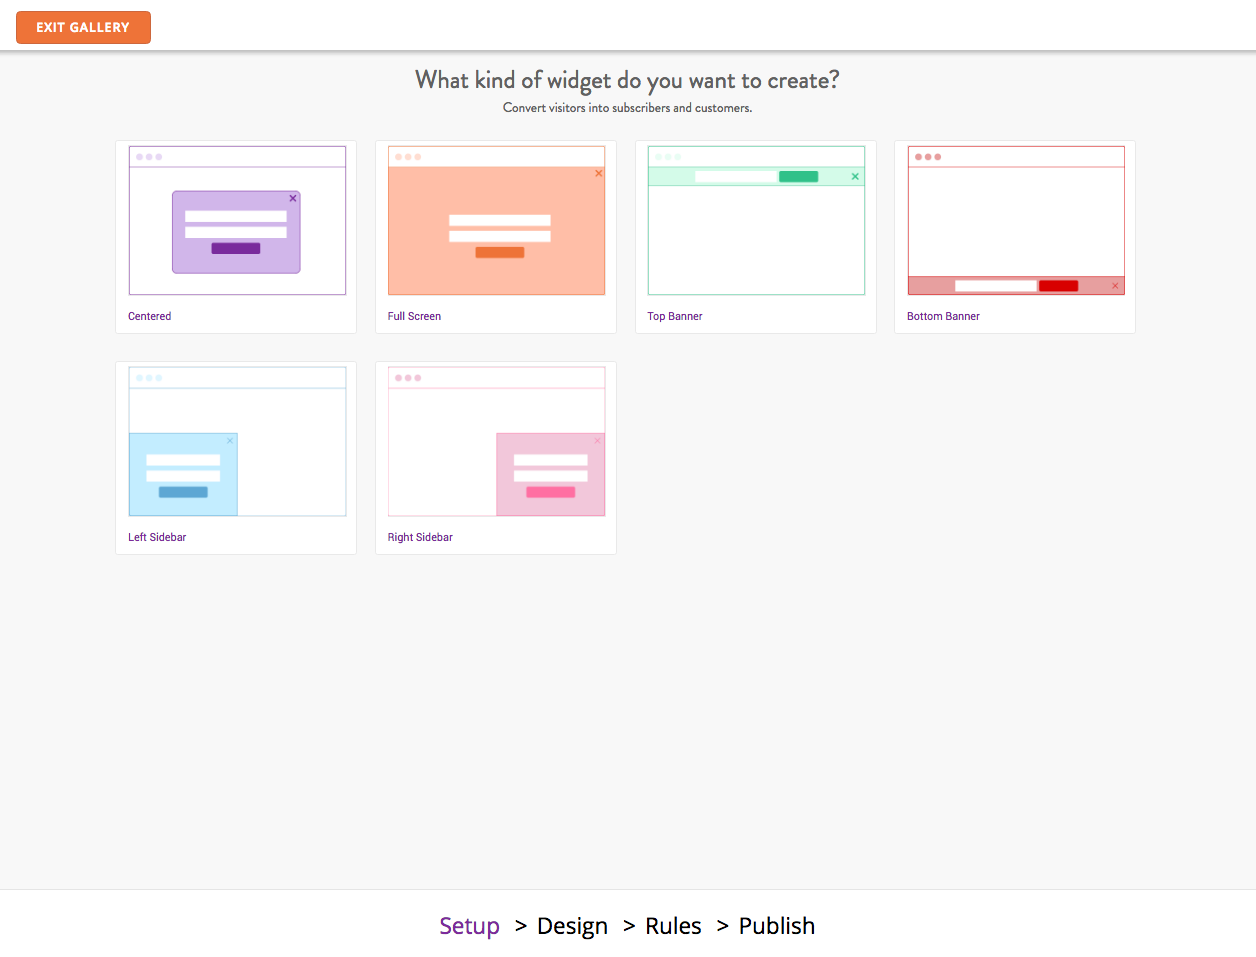
Step 1: Setup
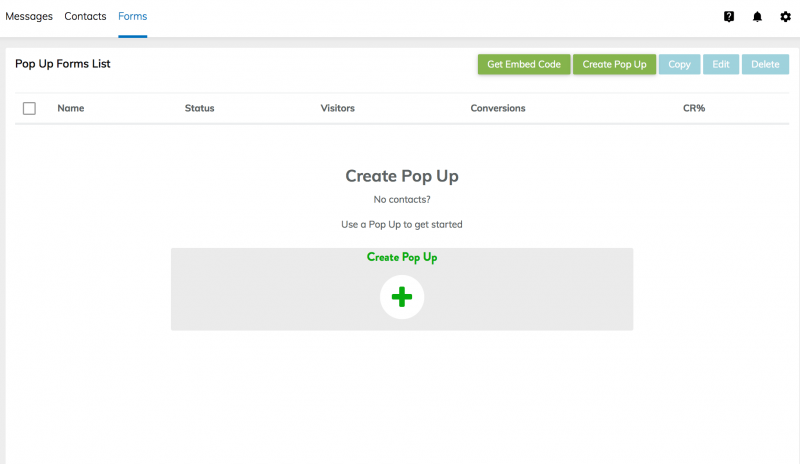
Click the Forms tab in the VerticalResponse app, and then click “Create Pop Up.”
You have six different layout options as to where the form will be placed on your website: Centered, full screen, top banner, bottom banner, left sidebar or right sidebar.
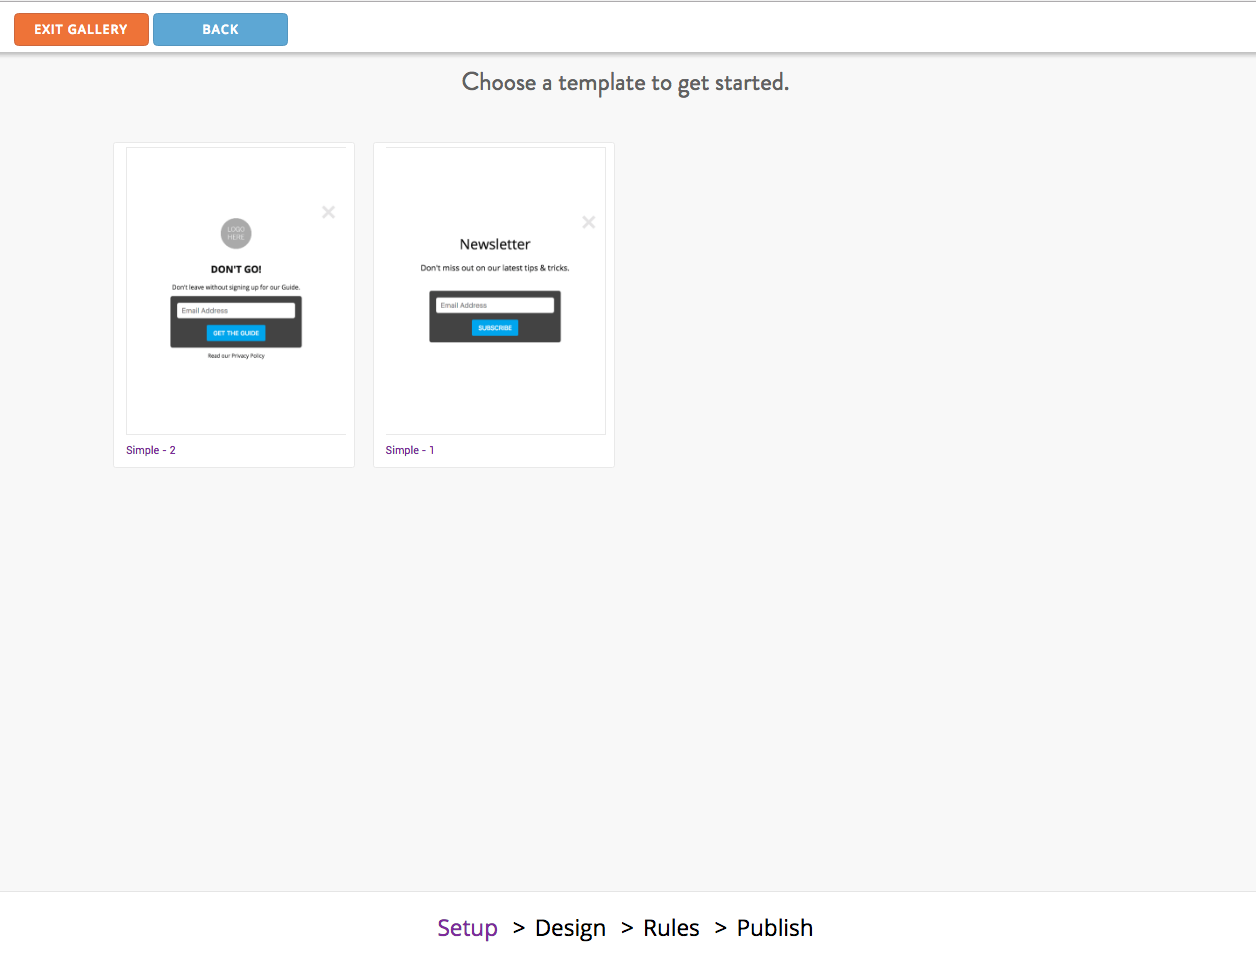
For each layout, there are two template options that you can select from for the starting point of your design.
Step 2: Design
Add content blocks, edit content and select the page style in the Pop Ups editor. You have the option to include several different form fields. From visitors’ email addresses to their website addresses, you will be able to collect the information that you need.
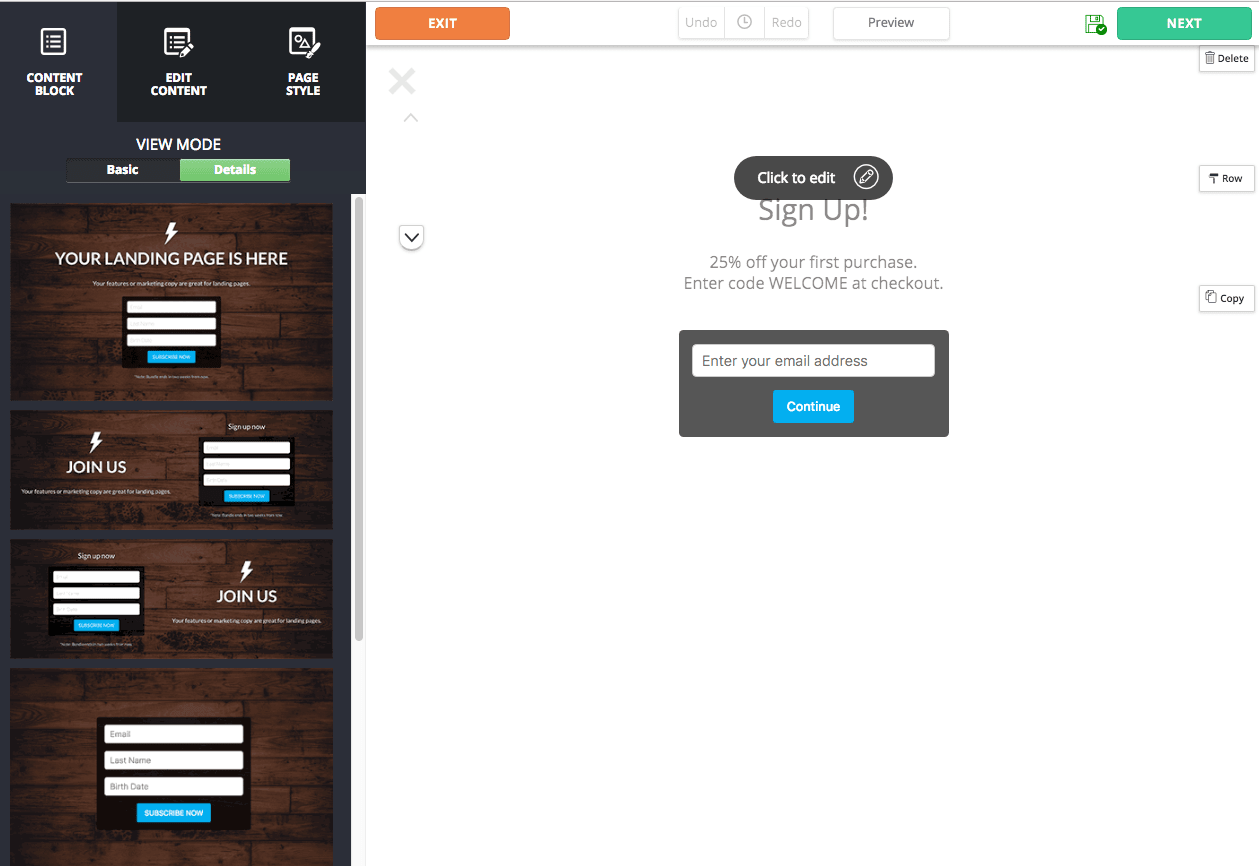
To ensure that visitors completely fill out forms, you have the option to create required fields. If a site visitor does not fill in a required field, they will see a red error in the form field.
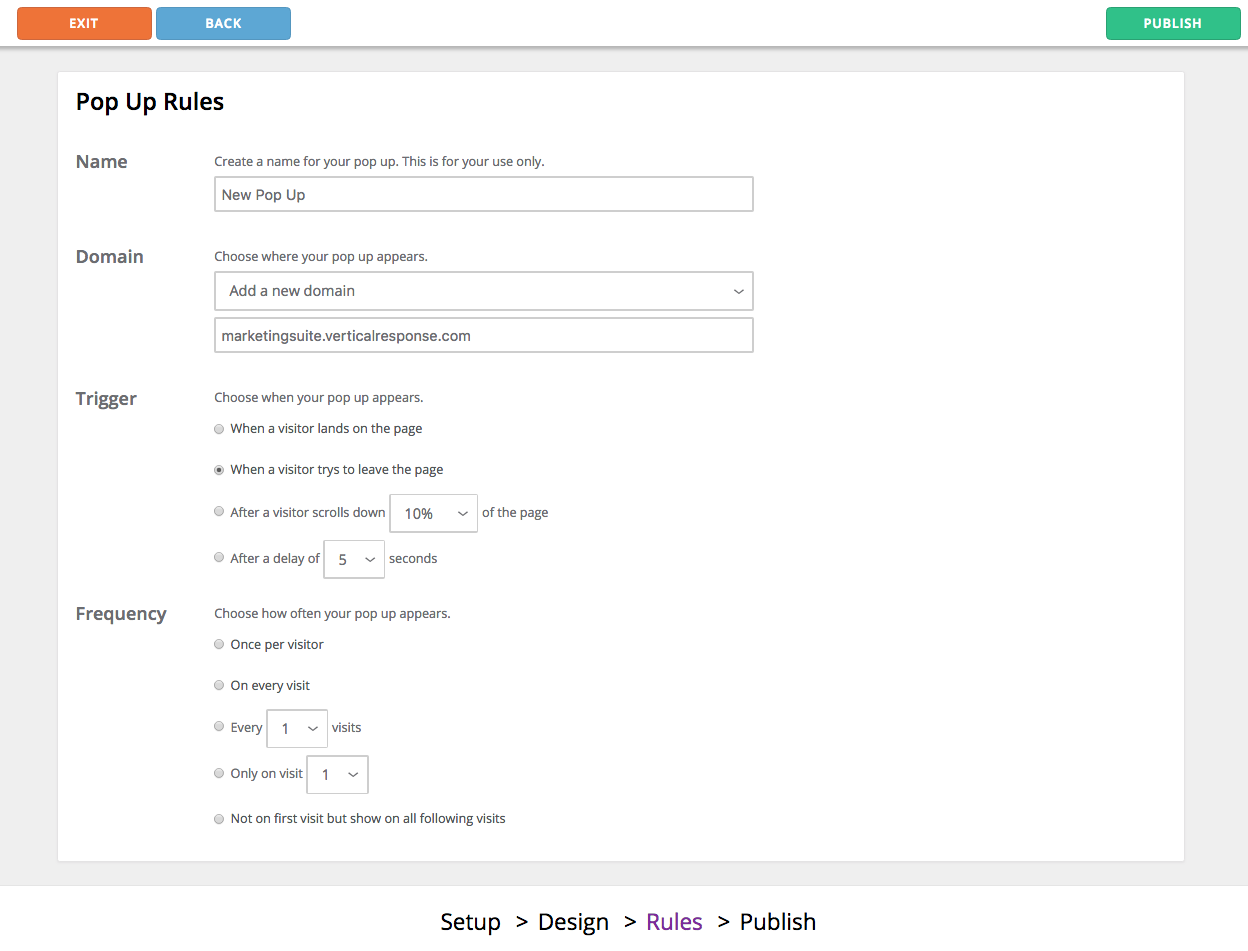
Step 3: Rules
Name the Pop Up (this is for your reference only, and will not be displayed to website visitors), and then choose whether you would like the Pop Up to appear on your own domain or on a Landing Page that you’ve already created in your VerticalResponse account.
Select when the Pop Up will be triggered:
- When a visitor lands on a page
- When a visitor tries to leave the page
- After a visitor scrolls down a percentage of the page (you can select between 10% and 100%)
- After a delay you determine (you can select between 5 and 60 seconds, in five-second increments)
Select how often the Pop Up appears:
- Once per visitor
- On every visit
- Every certain number of visits (you can select between 1 and 10 visits)
- Only on certain visits (can select between the first and tenth visits)
- Not on the first visit but on all following visits
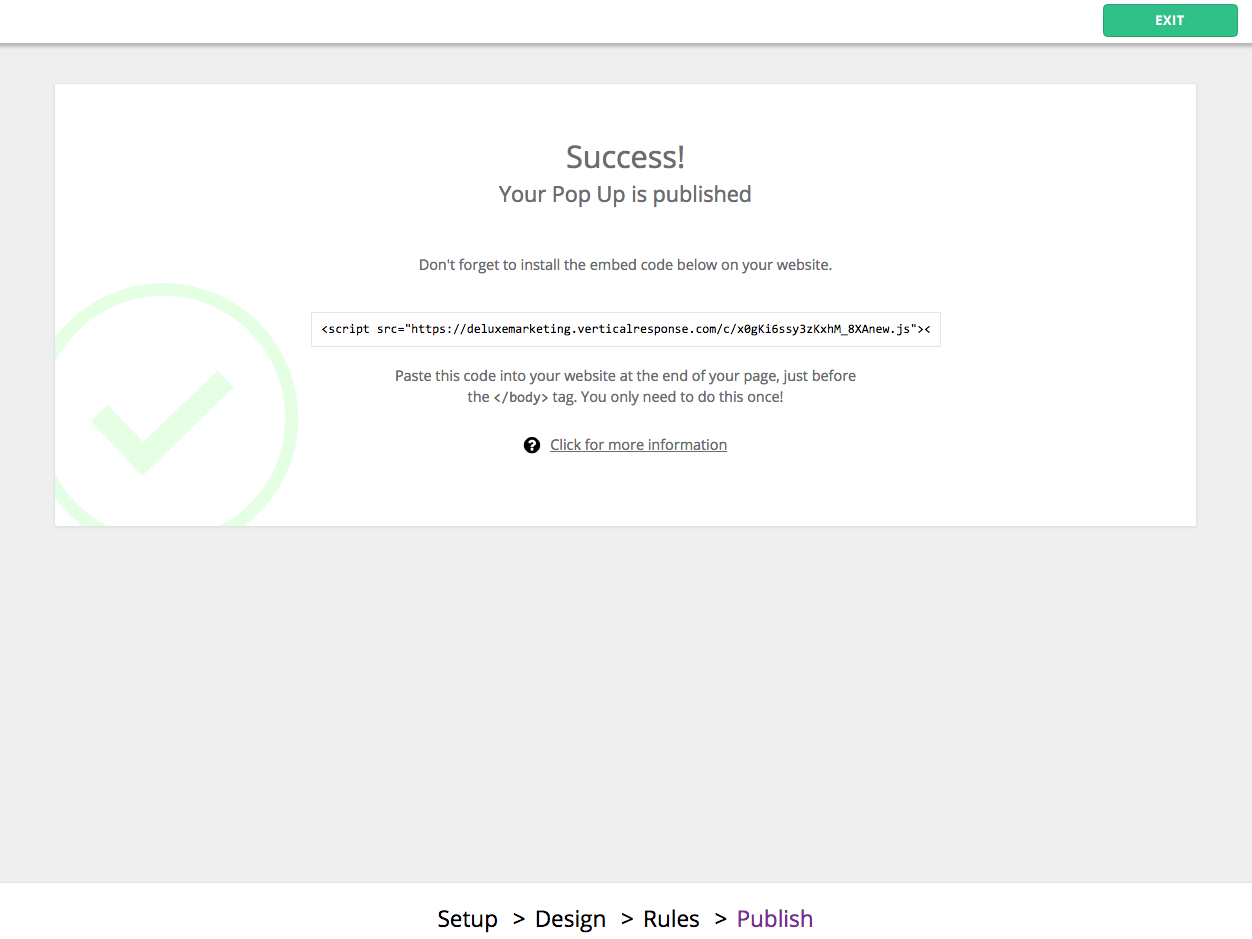
Step 4: Publish
This step confirms that the Pop Up is published and provides the embed code that you will need to paste into your website just before the </body> tag. Even if you chose to use a VerticalResponse-created Landing Page in step 3, you will still need to go into the Landing Page and add the embed code. The code will not be added automatically.
After you add a Pop Up to your website or Landing Page, you can view all of your Pop Ups by clicking on “Forms” in the top navigation. This will let you select the status of each Pop Up (choosing whether to keep it active or not), as well as view the number of visitors and conversions, and the conversion rate.
VerticalResponse Pop Ups help you gather new newsletter subscribers, connect with prospects who want to learn more about your products or services, and collect visitor demographic information that enables you to create more targeted marketing messages. Start creating Pop Ups today.
Build, send and track emails that look great on any device
Editor’s note: This post was originally published in February 2015. It has been revamped and updated for accuracy and relevance.
© 2018 – 2019, VerticalResponse. All rights reserved.


 Features
 Pricing
 Partner
 Blog
Blog Support
 More
More Terms of Services
 Privacy Policy