Set up your email campaign: VerticalResponse’s new editor makes it easy
Our new email editor gives you more freedom to change the layout and individual design elements of your campaigns. To introduce all of the updates and help you start sending emails today, we’ve created a series of how-to guides. In this edition, we show you how to create a contact list and schedule campaigns.
Creating an email list
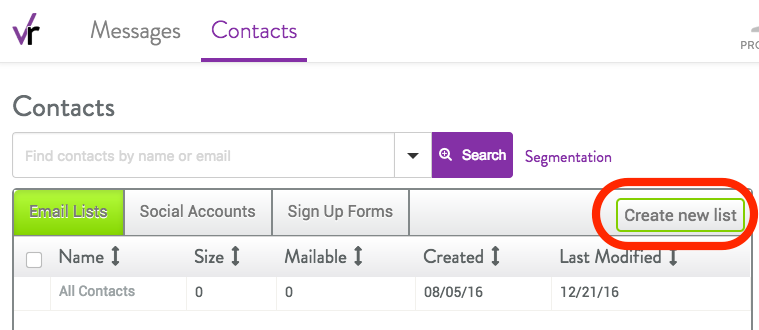
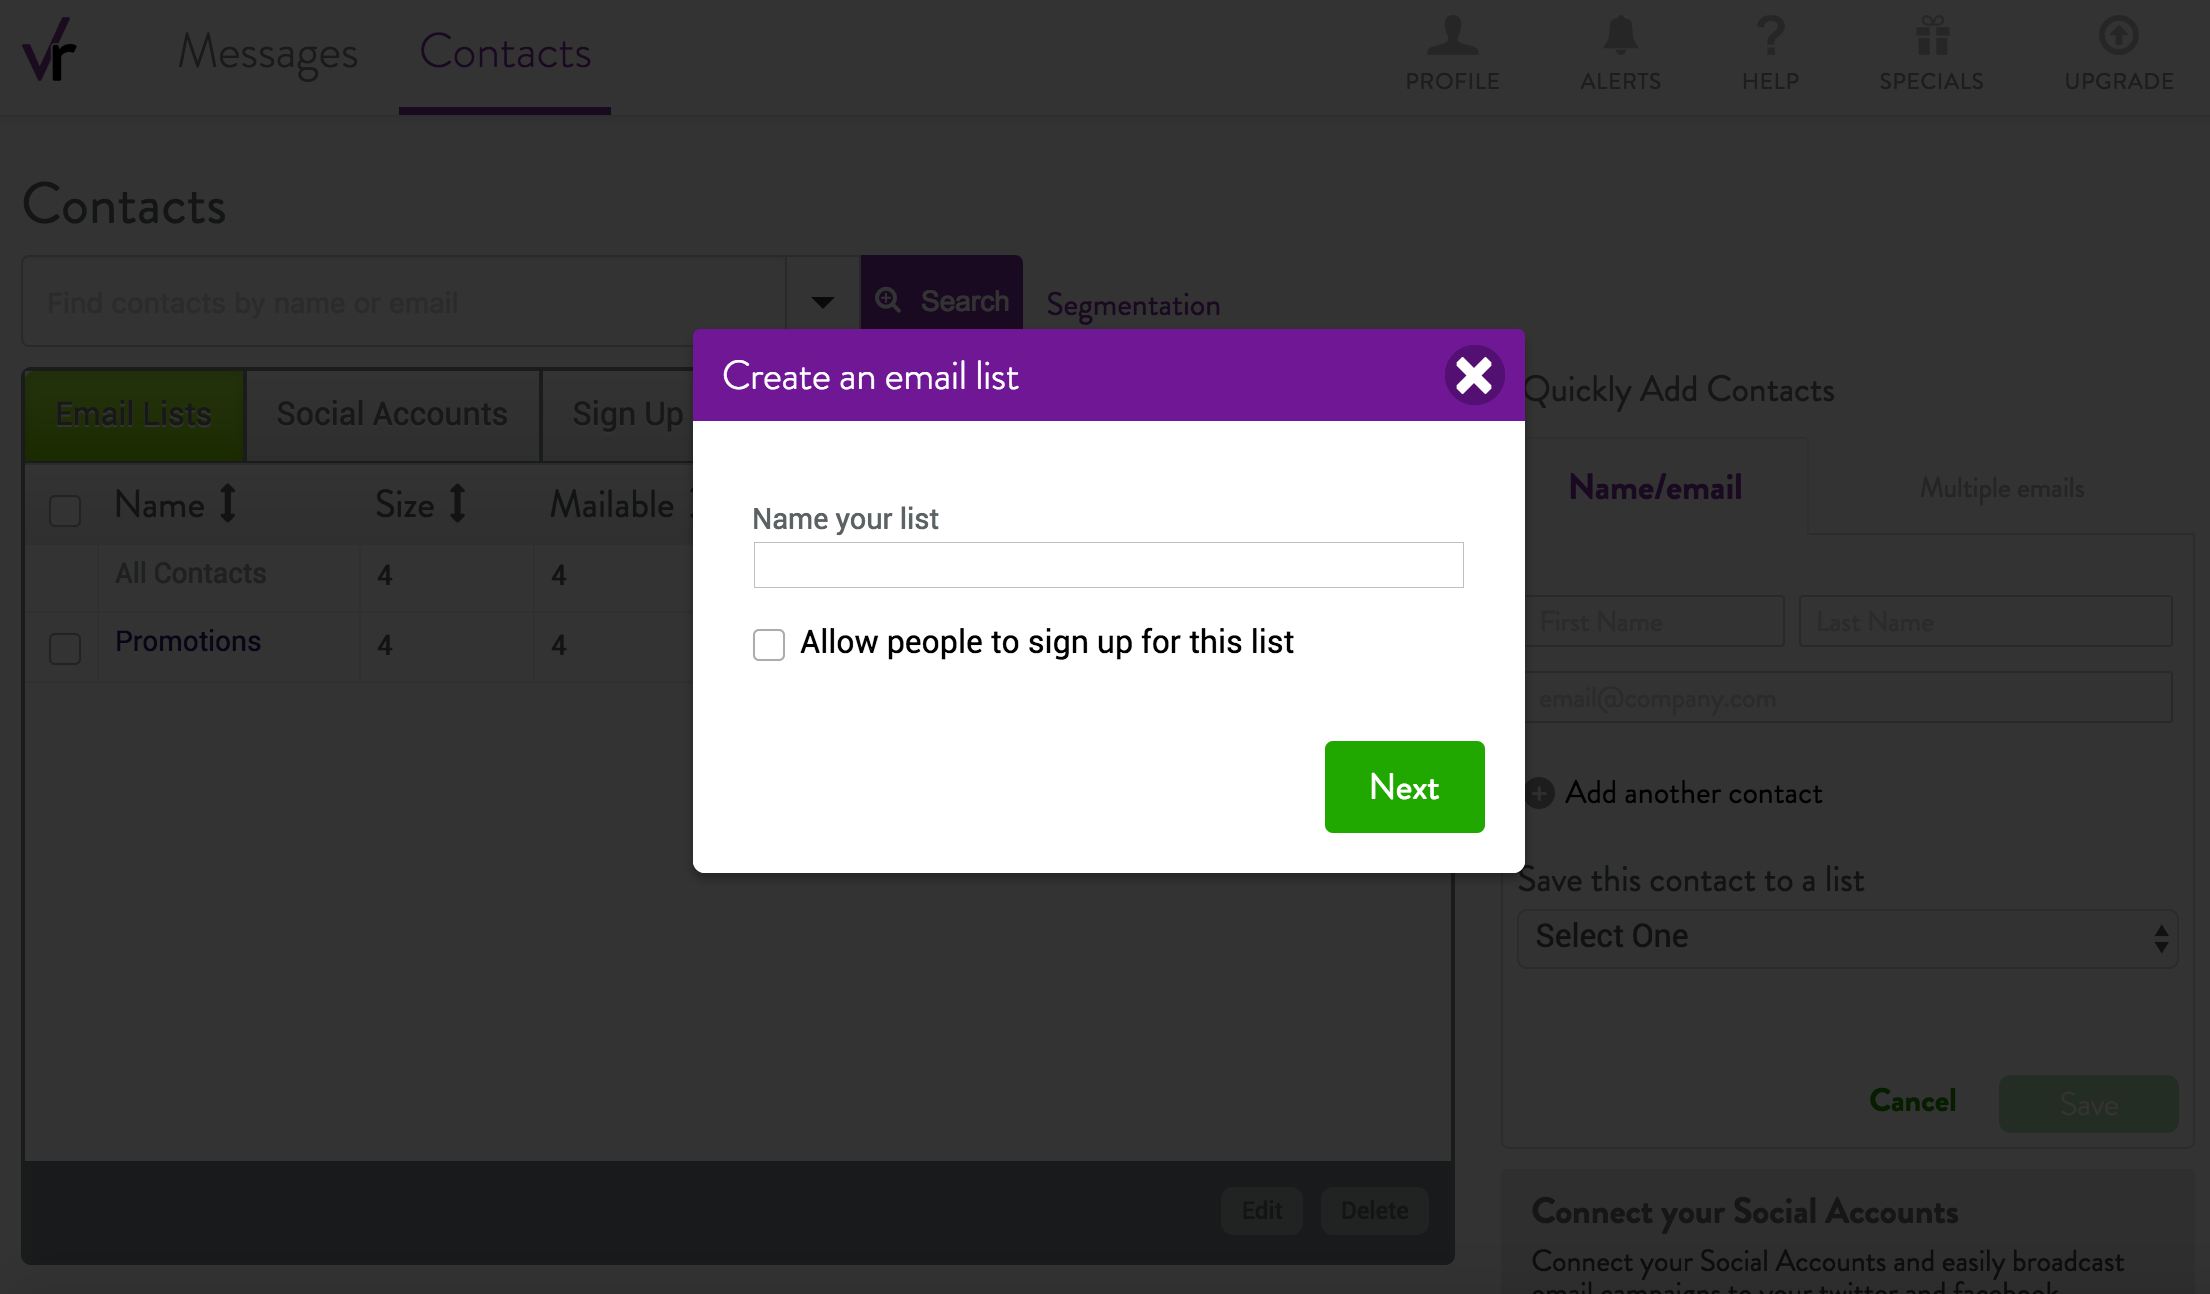
Before you can send your first email campaign, you’ll need to set up your distribution list. To get started, log into your account and click Contacts in the top menu. Then click the Create new list button.
Next, give your list a descriptive name that indicates who is on the list or the purpose of the list, such as “newsletter,” “promotion,” or “new subscribers.”
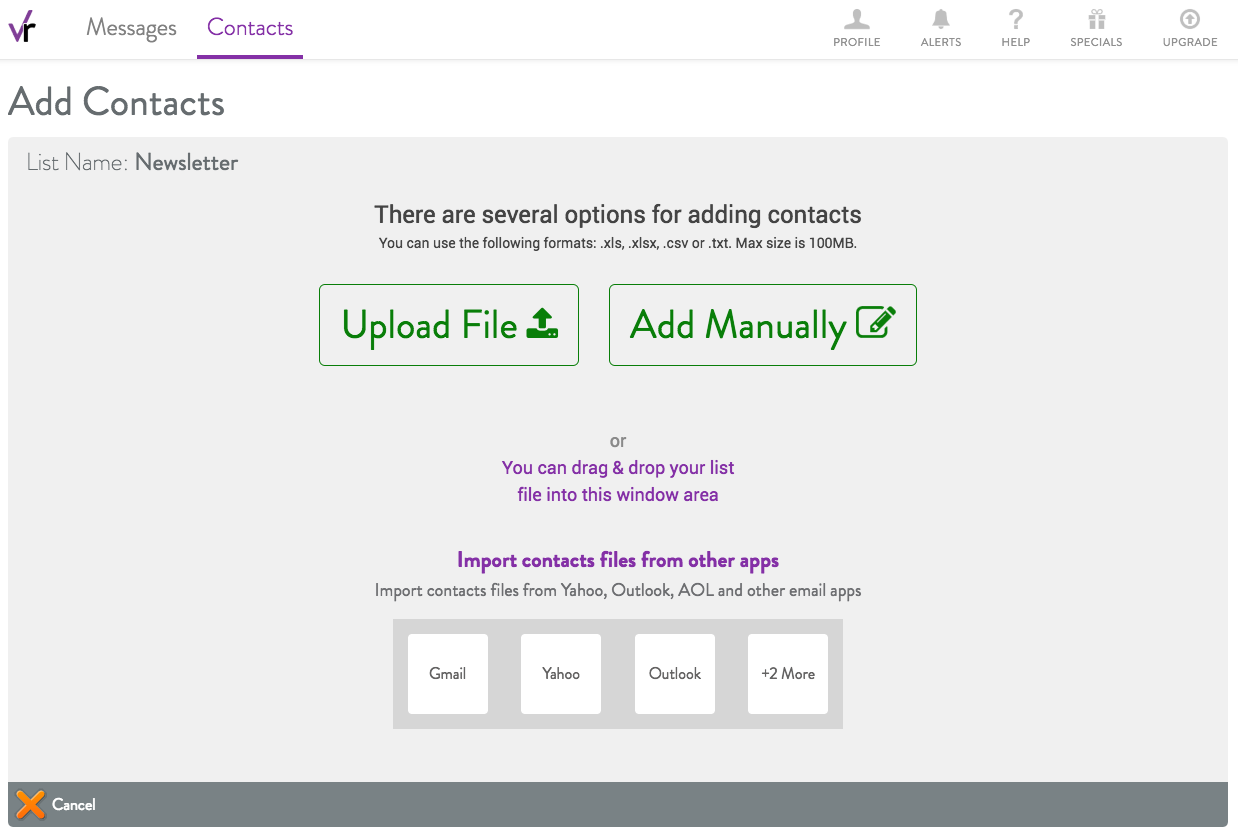
From here, you have the option of creating a list in four different ways: uploading a file, adding email addresses manually, dragging and dropping a file from your computer, or importing contacts from another app.
Uploading contacts: Click Upload File. Then browse through your documents and select the file you want to upload. Your file should be saved in .txt, .csv, .xls, or .xlsx formats. These are the most common types of spreadsheet files, and yours is probably already saved in one of these formats.
Drag and drop: To drag and drop a file containing your email list, select the spreadsheet file from your documents (once again, it must be saved in .txt, .csv, .xls, or .xlsx formats) and drag it into the window area.
Add manually: If you only need to add a few emails to a list, your best option is to do so manually. Click Add Manually and enter in the contact information.
Import from another app: You can import any contact files from Gmail, Yahoo, Outlook, AOL, and Constant Contact by simply clicking on the name of the app at the bottom of the Add Contacts window. Once you’ve done this, you’ll be re-directed to the email app that you’ve selected, and asked to choose the account that you’d like VerticalResponse to access.
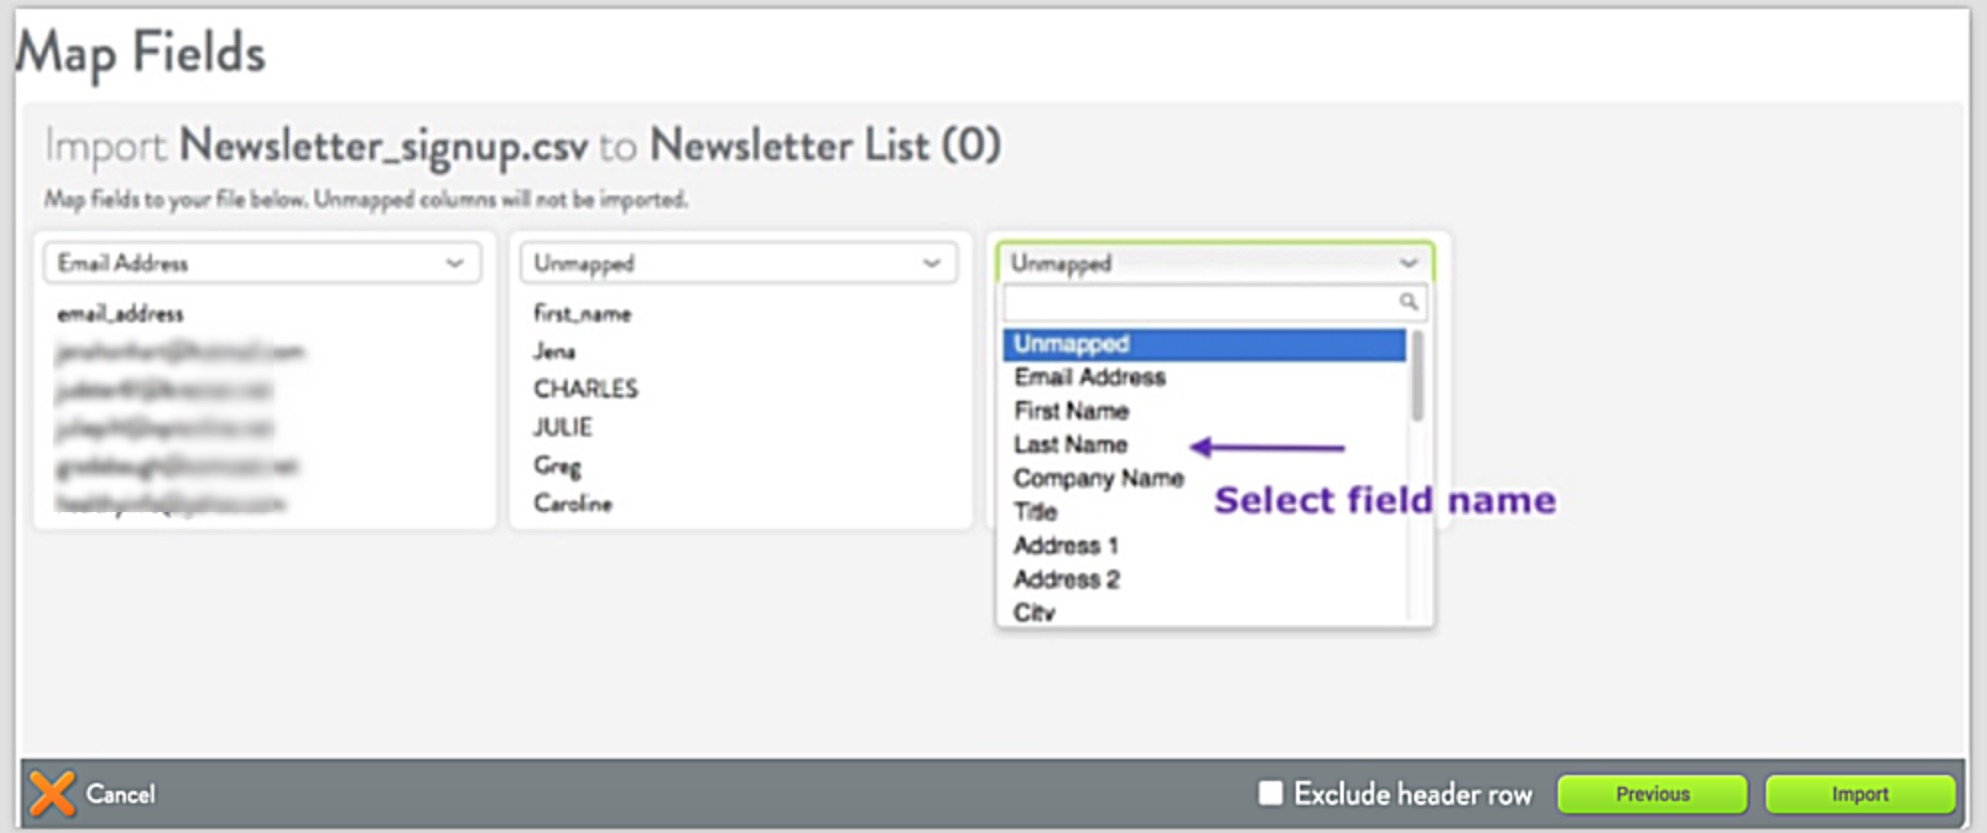
Once your contact file is uploaded or imported into VerticalResponse, you need to map your data to finish adding the list to your account. Take a look at the drop-down menus above your data, and match what you see in the column to the options in the menu. For example, in the column with email addresses, you’ll select Email Address in the drop-down.
If there is data you don’t want included in your list, select Unmapped and we won’t upload that information.
Once everything looks good, click the Import button on the right.
You’ll then see a page that displays how many email addresses were imported or not imported. Email addresses may fail to upload due to improper formatting, if the email address had previously unsubscribed from one of the campaigns you’ve sent to them, or because the address for some reason isn’t accepting emails (usually because they are old and no longer valid).
Quickly add contacts
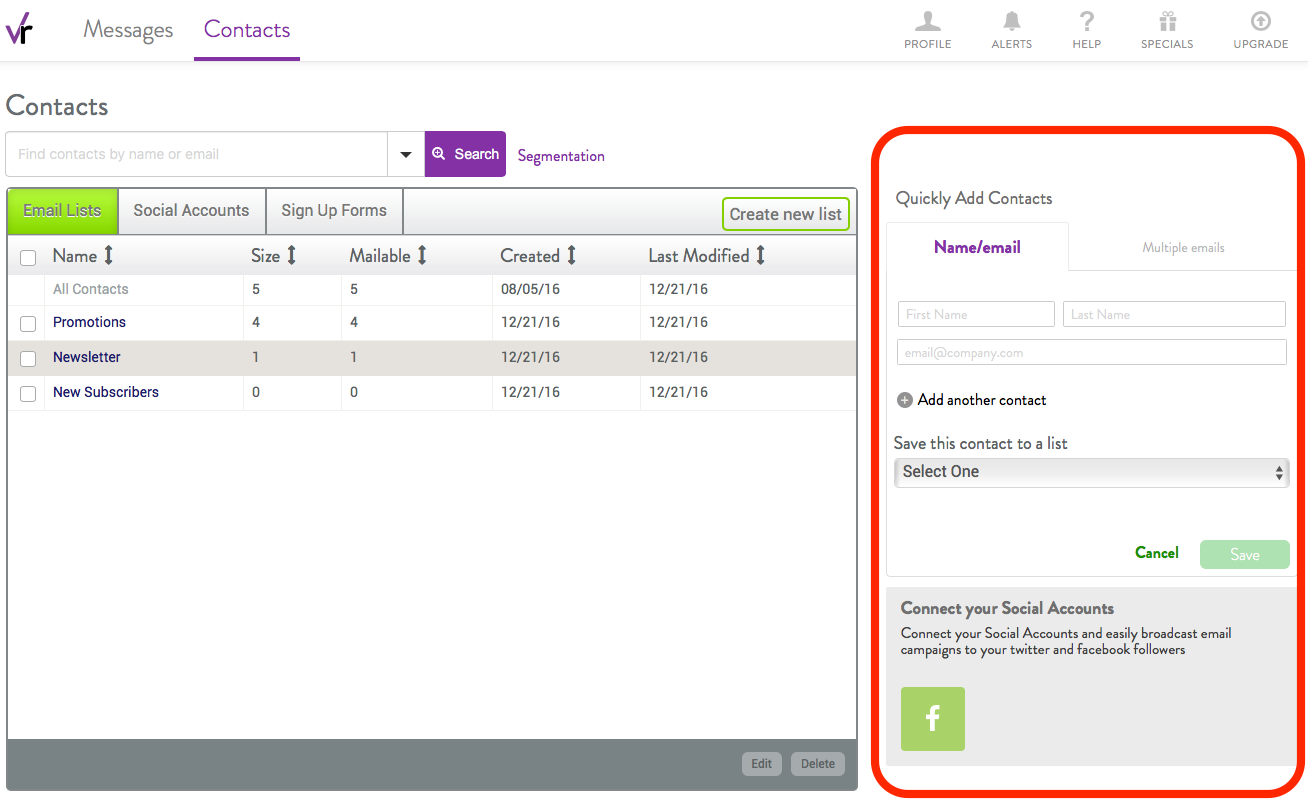
As your build your lists, you’ll want to be able to add new contacts to existing lists quickly. To do so, use the form on the right-hand side of the Contacts page.
Fill out the contact information and select the list you want to add it to.
Schedule and send campaigns
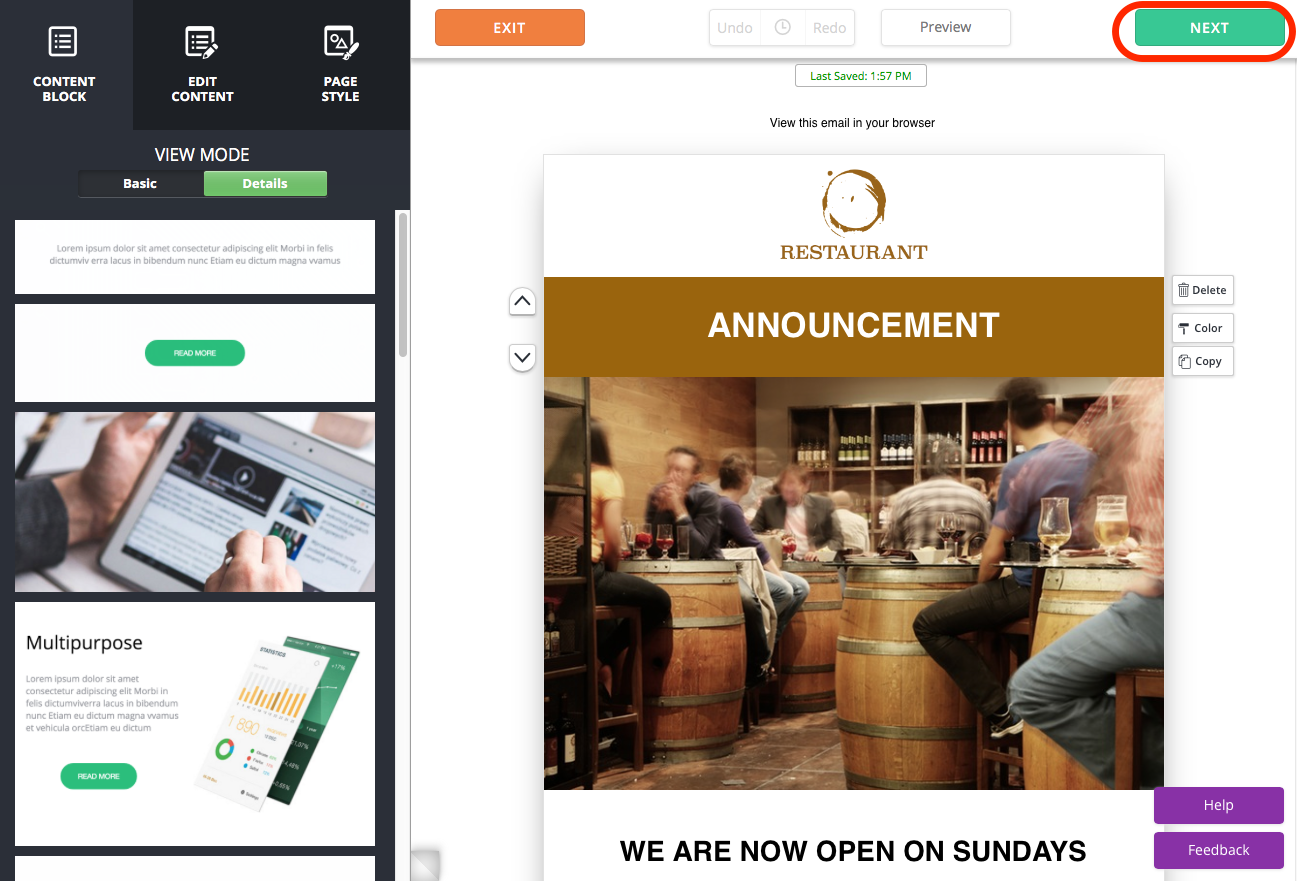
Once you’ve created your email list, chosen your template, and designed your campaign in the editor, it’s time to send out your email! Click the Next button in the top right corner of the editor.
On the Campaign & Sender Details page, you will have the opportunity to preview your email, so you can see how it will look on mobile, tablets, or desktop. You will also be able to send out a test email.
When you’re ready to send your email, select the list you want to send it to and schedule when you would like it to go out. You can either send it out immediately or schedule it for a later date. When you are ready to send, click the green Send Email button in the top right corner.
Our new editor makes creating and sending professional-looking email campaigns faster and easier than ever before. Find out more about the editor update here.
Build, send and track emails that look great on any device
© 2017 – 2018, Amber Humphrey. All rights reserved.


 START YOUR FREE TRIAL